Updated: August 24, 2005 by
Luclin.Magusmaximus
For a printable checklist click
here
NOTICE: This is an updated mirror copy of the page that used to be located at
http://www.frmug.org/~archer/Breakdown.html. I have been adding information and correcting mistakes from the original. Please note, if you wish to copy this guide anywhere, you must send me an email asking for consent. The reason for this is that if I have made any mistake and want to fix it, I don't want to have to contact everyone that has made a copy and nag them until they fix it. If you do see any mistakes feel free to email me at
Rob.Meyer1@gmail.com and I will get to it as soon as possible.
Introduction
Breakdown in Communications is an over-arching quest, tied into the
lore and progression across Taelosia. As a rough outline, you are supposed to
figure out what happened to the scouts the Wayfarer Brotherhood sent out to
Taelosia, why they aren't reporting anymore, and what they discovered.
Each zone has a part of the quest associated with it. You will need to
do all the zones to gain your progressive reward. The zones may be completed
apparently in any order, but the reward is tied to a specific order. If
you have completed steps #2 and #3, you will not get anything until you
have also completed step #1.
Note that some of the steps are single-group doable (in fact, several
occur in instances or areas where you can only bring a single group), while
others require full-blown raids, like the Ferubi one.
Thanks a lot to the fine folks at The Safehouse for this document's
contents, as well as Lucy & Allakhazam for more details on items and mobs.
Beginning
Talking to Fezbin Fizzles
Fezbin
Fizzles will only talk to you if you're 65. He's located on the ship in
Abysmal sea, in the hall where Morden Rasp resides,
at loc -35,+60.
You say, 'Hail, Fezbin Fizzles'
Fezbin Fizzles says 'Greetings adventurer, have you come to explore this new [continent] we recently discovered?'
You say, 'i have come to explore the new continent'
Fezbin Fizzles focuses his attention on you.
Fezbin Fizzles says 'Due to some rather odd events with Calliav, we,
the Wayfarers Brotherhood, were guided here to the continent we have
come to call Taelosia. It is a continent which has suffered through a
great magical explosion and now the native inhabitants are in dire
straits. Our goal was to investigate this continent and find out more
about the strange pieces of matter that we recently found in various
places. All signs led us here and so we decided to build this
magnificent floating city you are standing in. Unfortunately, we have
found out some rather disturbing [news] recently that has all of us
rather concerned.'
You say, 'what news'
Fezbin Fizzles says 'Well, when we finished the city, we
began to send out scouts to various locales all over the new continent.
Right away information started to flow in. They gave us details on the
layout of the land and its current inhabitants. We began to piece
together this picture of the current state of things on land. Many of
the reports gave details on various things like wildlife and climate as
well as the local inhabitants and level of advancement. All of this
seemed promising to us as we thought we might be able to talk to the
natives and find out more about the strange matter that seemed to
originate from this place, but then we begin to receive some very
[upsetting reports].'
You say, 'what upsetting reports'
Fezbin Fizzles says 'Apparently, the event that spread these
strange pieces of matter all over Norrath brought with it a group of
beings more horrifying than a shaved dwarf. These creatures seemed to
be an organized army of some sort. They have apparently taken over the
continent and enslaved the natives. Curious about this, we ordered our
scouts to find out more about these beings. Specifically, if they could
be reasoned with and if they knew anymore about the odd chunks of rock
we found recently. Shortly after we made this demand, everything
[stopped].'
You say, 'what stopped'
Fezbin Fizzles says 'The scout reports stopped coming in. We
figured that maybe they had just not found anything yet, but as time
went by we began to worry. That's when Morden suggested that we send
someone to find one of them and learn what was going on. Young Falcin
did not know what he was getting into when he volunteered to check
things out for us. Falcin left here under the light of a full moon and
returned soon after barely able to breathe. He had been caught spying
on the beings that currently control the continent. They had tortured
him for hours trying to get information. Being the resourceful human he
is, he managed to escape only to be mauled by what the natives call
ukun, a humanoid creature that is twisted and lethal. Left for dead,
Falcin dragged himself back to us and explained what he had
[discovered] during his ordeal.'
You say, 'what had he discovered'
Fezbin Fizzles says 'Falcin told us that all of the scouts
had been captured and were either dead or were enduring extreme torture
sessions. These invading beings are a vicious lot who show absolutely
no mercy. Falcin's wounds were proof enough of that. Falcin explained
that the scouts who were still alive are being held near where they had
been discovered. Those who he could not find he assumed were dead but
he still tried to get some proof before he wrote them off.
Unfortunately Falcin would not live to see his desire through, he
passed on shortly after revealing this information to us and now we are
at a loss as to how we can help our scouts who are still living return
to us and provide a proper burial for those who were lost. We cannot
afford to send anyone else out there as it seems it will require a
significant force in order to have any chance of accomplishing the
[task] we need completed.'
You say, 'what task'
Fezbin Fizzles says 'With half of our numbers back home
dealing with the investigation of the recently unearthed dungeons and
the rest here on the ship handling what information we have and trying
to decide the best plan of action, Morden figured it might be a good
idea to ask some courageous individuals to assist us. Morden has
authorized some form of valuable reward for those who can bring us any
information regarding our missing scouts or the scouts themselves.
Seeing as how you have been so interested in all I have said so far, do
you think you would be interested in helping the Wayfarers
Brotherhood?'
You say, 'i am interested in helping the wayfarers brotherhood'
Fezbin Fizzles says 'Most excellent. Please take these as a
token of our gratitude. It is not much to look at now, but by helping
us you will find ways to make this stone more [powerful] when combining
it with certain items in that sealer. Please take the time to find
Taminoa Bialu, Vaifan Cogswin, and L`diava Rexxen. They are all located
on this ship. Each of them is responsible for information from certain
areas of the continent. Taminoa has all the information on the city
area, Vaifan keeps the information on the mountain passes, and L`diava
collects information on the temple areas. If you truly wish to help us,
talk to some or all of them and they will help guide you to the right
path. When you have finished helping them all, return to me and I shall
give you the reward that has been approved by Morden.'
You say, 'how is it powerful'
Fezbin Fizzles says 'The stone I have given you is very
special indeed. It is a rare stone with a power that has not yet been
revealed. After studying it we have come to the conclusion that its
power is based off of resonance. You will see that there are fourteen
sockets in the stone. Each socket requires a gem fragment of a certain
resonance. As the fragments are set in the stone it will gradually
increase in power. These fragments must be placed in the stone in a
certain order using a set of clockwork gemcutter's tools, the stone,
and the correct shard in the device I handed to you along with the
stone. As you help find our scouts, you may come across the gem
fragments that will fit into the stone. If you do, please try combining
them in the special sealer. If at any time you lose the sealer or
misplace the stone return to me and I will what I can do about a
replacement.'
This lenghty text maks the beginning of the quest. You are now
flagged as being on the quest, and can now talk to the three Wayfarer mentioned
in the text: Taminoa Bialu, Vaifan Cogswin,
and L`diava Rexxen to get the appropriate instructions.
If you mess up a specific part, saying "I need to rescout xxxxx"
where xxxxx is the zone name (Qinimi, Barindu, and so on) to
Fezbin will
restart that part (you need to go again to the appropriate Wayfarer to get
flagged for that quest step), until it is completed (you get the shard).
If you lose the items obtained during the overarching quest, a simple hail
will give it back, whether you're at step #1 or #14. This is important for
the augment crystal, which you can only destroy by dissolving (for now)
if you used it before completing another step. Dissolve the crystal from
where you put it, and talk to Fezbin to get it back for
the combine.
Please note that a lot of the quests will involve having to hold on quest
containers, which a lot of people hate. Also, turn-ins rely on flags. Do not
attempt to do any turn-in of a quest piece unless you are appropriately
flagged.
Step #1: Qinimi
Talking to Taminoa Bialu
Taminoa
Bialu is located in the same area as Fezbin.
You say, 'Hail, Taminoa Bialu'
Taminoa Bialu says 'Greetings. You must be one of the
adventurers that Fezbin told me about. It is a pleasure to meet such a
brave individual. Where are my manners? My name is Taminoa Bialu and I
compile all the information from our scouts in the [city] area of
Taelosia.'
You say, 'What city?'
Taminoa Bialu says 'Well, it appears the native inhabitants of Taelosia
lived in a grand city once. This city is made up of four different
areas named in their language. They are [Qinimi], [Riwwi],
[Barindu], and [Ferubi]. Based off of early information, we
believe each area had a specific purpose. I am still trying to decipher
the native language to figure out what the names mean, but going off of
visual information I can assume that Qinimi served as their court, Riwwi
is where they held games, Barindu was a lush garden, and Ferubi was a
central place of worship once. That is about the extent of my information
as far as the intended purpose of each area. What they are now used for I can
explain in further detail. Which area would you like to hear more
about?'
You say, 'What is Qinimi?'
Taminoa Bialu says 'It appears the Muramites have made this some sort
of stronghold. Destroying many of the native symbols, the invaders have
converted the building that once served as the court into fortified
headquarters. It is here you will find a structure called the Chamber
of Souls, various pens to hold ukun, and a moat of sickly black sludge.
The structures that the nihil once called home are all but destroyed
now. Very sad indeed. That's where the legion keeps the bulk of the
[slaves]. I believe that the scout for this area was caught sneaking
around the housing district, but I have no proof. If you were to search
this area, maybe you would find some sort of sign or marker he may have
left. That would be helpful.'
So, Kreshin the scout seems to have been caught.
You first need to confirm this, and what he was doing at the time.
Finding the report
The Kreshin's
Journal Page from Qinimi is a ground spawn that looks like a book with only
its spine showing. Follow the right zone wall coming from Natimbi, until you
get to the 2 rows of buildings. Just before them is a rock/rubble. The page
spawns on top of that.
Respawn time: unknown
Turn the page in, and you are directed to a prisoner,
Councilman
Sislono Nislan.
Sislono's Key
Start by handing Sislono the journal page you got back.
Councilman Sislono Nislan says 'Yes, I have seen this and others like
it before. While we do not understand where it comes from, we have come
to the conclussion that these strange glyphs express somthing important
to your people. These particular glyphs were made by the small one they
hold captive in the courtroom. If you wish to help him, you will have
to retrieve the [stone of entry]. Only with this stone can you enter
the courtroom and help the one who calls himself kreshin.
You say 'stone of entry?'
Councilman Sislono Nislan says 'Gaining access to such a private place
has always been reserved for the elders of my people. While the legion
may have destroyed our home, they have yet to figure out a way around
many of our wards that bar access to our sacred areas. Unfortunately,
thier frustration at gaining entry resulted in the painful torture of
many of my people until they were given the keys to enter. The
courtroom requires one of these keys and while the invaders hold all of
the existing keys, I can create one if you can retrieve the proper
[items]
you say 'items?'
Councilman Sislono Nislan says 'The key consists of mud, some stonedust
particles, and a piece of chalk. The mud can be found in the sewers
beneth the city. The stonedust is plentiful near the coliseum, and the
chalk can be found all over this area. Bring these to me and i will
make you a temporary key which will grant you access to the courtroom.
I implore you to hurry. I fear the one you seek may not be alive much
longer.'
Councilman Sislono Nislan needs 3 items to make that
Stone of Entry. Those three items are:
Turn them to Sislono:
Sislono covers the three pieces in his hands, closes his eyes, and
begins to chant. A glow begins to emanate from his hands and he begins
to chant louder. Then, just as quickly as it began, the glow in his
hands dims and the chanting stops. 'There you are -- the key which
grants you and your party access to the courtroom. Just stand on the
pedestal in the center of the large building in this part of the
citywith the key in your hand and say you Wish to enter.'
'There is one more [thing] I must tell you before you go.'
You say 'What thing?'
Councilman Sislono Nislan says 'The geomantic device which raises you
into the courtroom is an ancient one and takes time to reset after it
has been used. If you are having trouble entering, be patient. You will
know it is ready to recieve a key when you hear a grinding sound from
the base of the device as it settles into place. Please be sure you are
fully prepared before entering. While it once was a place of peaceful
discussion, the courtroom is now a place where terrible torture is
conducted by those the legion wants information from. When they see
uninvited guests, they will not be very happy. The leader of this
area's force is known as Tixxrt and stopping him is the only way you
can save the small one, called Kreshin.'
Saving the scout
With that key, a group gets to attempt to save the
scout from execution. Think Plane of Justice trials. You need to make your
way to the temple on the south side of the zone, all members of a full group
must be standing on the pedestal inside there (non invisible), and the person
with the
Stone of Entry
has to say "I wish to enter" while holding the Stone on his/her
cursor.
There are a couple mobs
which you must clear. The trial begins with 3 mobs
which aggro right as you arrive in the event area. Every time you defeat
one triplet, the next triplet comes live (just like the Trial of Execution,
except the mobs are pre-spawned, just inactive) once all corpses are looted
(apparently, if you don't loot, the next wave stays blocked). After 3 waves,
the boss and his 2 guards become targetable.
After the boss goes down, the executioner Xocik spawns
and has to be killed (the guards may still be live).
You only have a limited time to kill everyone (six minutes). After the timer
runs out, you get teleported out again, assuming you are not dead, and a
zone-wide emote announces the execution of Kreshin.
If you are dead, there is
Besana
the Gravedigger in the zone who will summon your corpse out for
free (access to the corpsemaster isn't that easy, though, you will need
invisibility to run to the corner) if you say that
"I wish to live again".
Xocik writhes in pain as his body falls to the floor. Your valiant efforts have resulted in the rescue of Kreshin.
Kreshin Silentcog says 'Thank you for rescuing me. I sense that one of
you holds a stone key which allowed you entrance into the courts.
Please show it to me.'
Hand the Stone of Entry to Kreshin.
Kreshin Silentcog says 'You have done well to get this far. Please, take this
to Taminoa and tell him it is vital that he decipher it. I must stay
here to investigate more. Let him know I am safe and thank you again.'
You get the stone back, as well as a
Writ of the Magi. Note
that multiple persons can hail Kreshin and do the turn in. Time to go
back to Taminoa.
Another ennemy
Taminoa Bialu says 'Finally, you have returned and with some
information I see. Kreshin contacted me in advance to let me know of
your daring rescue. We are indebted to you. Now, back to business.
While I cannot make out most of it, Kreshin has translated some of it
and it appears to be a description of a ritual one of the head ikaav
performs regularly. Apparently she has been trying to absorb the
geomantic powers of the natives of Taelosia. The details are kind of
sketchy as Kreshin was only able to translate so much, but some
information is better than none, I always say. Anyway, it says here
that the ritual is conducted in the Chamber of Souls. It used to be a
large tower which the natives used to watch the shores. The tower was
destroyed when the invaders took over the area and converted it to a
ritual chamber. They used it in experiments centered on the extraction
of magic. The head ikaav, known as Xictic, has been trying to use the
powers of the native Taelosians to build an army of stone workers that
he can directly control instead of relying on the ability of slaves.
During the ritual, Xictic stands atop a platform which is suspended
over a circle of platforms. The center platform holds an inanimate
stone worker while eight ikaav stand on smaller platforms around the
center. What happens next is not really known, but the end result is
three lifeless slave corpses. According to this, she has not yet been
successful, which I would say is good news. But if we do not stop her,
she could easily reinforce the numbers with stone workers tainted by
the touch of this legion. I know you have accomplished your goal, but I
must ask that you find a way into this ritual and silence Xictic for
good. Show this to Nislan. He should be able to decipher the images. I
believe this is the key to getting into the ritual chamber. Now, hurry
please and return to me with proof of Xictic's death so that I can make
a final report on the Qinimi area to Fezbin.'
Taminoa hands you back the Writ of the Magi
(slightly altered), which must be brought to Sislono Nislan.
Councilman Sislono Nislan says 'These glyphs look quite
familiar. They are definitely in my language, but it seems as if the
one who etched them did so against his will. Where did you get this?
Wait, don't tell me. I know. Kreshin must have been successful in
finding out what was going on in the Chamber of Souls. These glyphs
detail how to animate stone using our geomancy abilities. There are
some strange symbols toward the bottom, but for the most part, this is
our language. Could he be trying to conduct the [ritual] of my people?'
You say 'What ritual?'
Councilman Sislono Nislan says 'While animating stone
comes easy for us, sometimes we need an extremely powerful stone worker
to help with the city. These stone servants were made through a ritual
which combined the power of eight geomancers into a ninth. This
geomancer would then imbue a stone worker with this power, resulting in
a more powerful construct. We stopped doing the ritual when we
discovered that it could take away our ability over time. If [she] has
somehow figured out a way to absorb this power, then my people could be
in more danger than I thought possible.'
You say 'She?'
Councilman Sislono Nislan says 'We refer to her as the
silent one, but the legion calls her Xictic. She is one of their kind
who can use magic and she seems to be quite feared by everyone in this
area. She comes here sometimes and takes three of us into the building
with the glowing dome around it. Along with her are eight magic-using
invaders and some of the slavers. When they are finished, only members
of the legion leave. None of my people who enter are ever seen again.
If what this says is true, you must stop her. If she succeeds, she will
be able to control our stone servants at will and cause even more
destruction. I beg you to stop her. I will help you in any way if you
[promise] to stop her.'
You say 'I promise to stop her'
Councilman Sislono Nislan says 'I cannot tell you how
relieved this makes me. Now to the issue at hand. While Xictic and
those she chooses can roam freely in and out of the magical dome
surrounding the chamber, if anyone else tries to enter they are held
back. As a councilman, I was granted a device that allows access into
the dome and I've managed to keep it away from the prying eyes of the
Mata Muram. Using it is not without its consequences, though. As soon
as an outsider shows up within the dome, they will know what has
occurred and will come searching for the culprit so be certain you are
ready to face the challenges ahead before you embark upon this venture.
Only eighteen of you will be allowed into the chamber at one time so
gather your forces and tell me you are [ready] to face Xictic.'
You say 'I am READY!'
You need to be in a raid of 3 groups for the next part. Your raid will be
teleported in the enclosed dome in the center of Qinimi to fight another ring
event. You now have 27 minutes to win. Kill all the 3 ratuks within 10
minutes or the first sacrifice goes thru and you get slaughtered by the stone
golem they created.
The waves:
- 6 mastruq
- 6 nocs & ukuns
- 6 more nocs & ukuns
- The 3 ratuks
- Kabeka Kret (archer mob, 1000dmg dot aoe, high dps, lots of HP)
- 4 snakes. Only one of them is your target, the others are decoy and will
despawn and respawn.
- Pixtt Xictic Krvne (boss)
Loot Xictic's Bloody
Robes as the proof Taminoa wants. 3 such drop per raid.
Other items from the raid
The finale
Step #2: Barindu
Talking to Taminoa Bialu
You say, 'Hail, Taminoa Bialu'
Taminoa Bialu says 'Greetings. You must be one of the
adventurers that Fezbin told me about. It is a pleasure to meet such a
brave individual. Where are my manners? My name is Taminoa Bialu and I
compile all the information from our scouts in the [city] area of
Taelosia.'
You say, 'What is Barindu?'
Taminoa Bialu says 'This area holds the remains of what was once a
place to build stone workers. We can only guess what purpose this part
of the city served and all we know now is that it is home to some of
the cruelest acts of violence against the nihil. I assigned this area
to Talwin, a young wood elf new to the brotherhood. He was a proven
scout eager to assist. Initially things were going well, but the
information he was sending was not helping much. I think this worried
him and resulted in him pushing his luck a little far. Ever since I
told him his reports were lacking the vital evidence we needed I have
not heard from him. Before Falcin passed on, I asked him if he had
found anything out about Talwin and he shook his head. I know Talwin is
still alive . . . he has to be . . . and I know that there must be some
clues in the area of Barindu somewhere. He was diligent about recording
what he found so I would assume that if he has been captured that his
writings must be lying around the area somewhere. See if you can find
two of his journal entries and bring them back to me. When you return
please give what you find to my assistant Opury Foop. She is trying to
help me organize my reports a little better.'
So, you are to find what happened to Talwin.
Find the report
Talwin's Journal Page
1 & Page 2 drop
from random mobs in Barindu. Collect the two pages, and hand them to
Opury Foop.
It seems Talwin was becoming friend with one of the slaves,
Proteri Amari.
Proteri Amari
You need to have Warmly faction to the Nihil to advance in the
dialog.
You say 'Hail, Proteri Amari'
Proteri Amari glances around nervously. 'Leave me be. I can't be seen talking to outsiders
You say 'who is talwin?'
Yes ... Talwin. He and I were becoming fast friends until
Ixvet took him. I am not sure what has happend to him, but if you would
be [interested] in helping me I may be able to assist you in return.'
You say 'I am interested'
Proteri Amari says 'Good, good. As you may have noticed, the majority
of these creatures are brutish types best suited for destruction. They
are kept under control solely by strong [leadership].'
You say 'leadership'
Proteri Amari says 'The one who controls this area of the
city goes by the name Ixvet Pox. She's as cruel as the rest, but
considerably more intelligent which makes her even more dangerous.
Fortunately, she's grown complacent and that gives us an [opportunity].
If we can destroy Ixvet, it will throw this area into chaos and we
should be able to escape before order is restored.'
You say 'opportunity'
Proteri Amari says 'I've managed to get someone loyal to our
cause placed within Ixvet Pox's entourage of personal servants and a
skilled herbalist tends to her favorite fruits in the gardens. We will
use this connection to poison the tyrant. Go talk with Kunimi Falade.
You can find her working on the Hanging Gardens. Give her this ring as
proof that you are there with my blessing and she will tell you what
she needs.'
You get a no-stat Simple
Stone Band as a token.
The exotic poison
Kunimi Falade is on the east side
of the hanging gardens, but you need Ally faction to turn in the ring.
You say 'Hail, Kunimi Falade'
Kunimi Falade glances around to make sure no one is within earshot then whispers, 'Who are you and what do you want?'
You say 'proteri sent me'
Kunimi Falade looks nervous at the mention of that name and says, 'I'm sorry. I don't know anyone by that name.'
At that point, turn in the ring as proof of your bona fide.
Kunimi Falade takes the ring and studies it for a moment. 'So the
time has finally come. Unfortunately, I have had little success. Our
traditional poisons have absolutely no effect on these invaders. They
don't even seem to notice the poison. But, there is some hope. I
believe I can distil a poison that will affect them if I had the right
[ingredients].'
You say 'ingredients'
Kunimi Falade says 'Creating poisons is distasteful business
and I'm afraid the items that go into it are just as distasteful. I
need the black bile of a hynid and the yellow bile of a tide feaster
from the shores of Natimbi and both a vial of corrosive slime and a
mass of insect larva from the sewers beneath us. Once I have these
items, I should be able to create an effective poison. Now, you should
leave before we're seen.'
Time for a little collection:
Turning them in and Kunimi will cunningly prepare a new poison.
Kunimi Falade takes the ingredients and gets to work. Within a few
minutes, she produces a viscous green liquid. Plucking a bunch of fruit
from the nearby plant, she coats the fruit in the poison.
Kunimi Falade says "That should do it. I can't be positive that
this will do more than give Ixvet an upset stomach, but we can hope.
Please take this to Proteri Amari.
You get a
Poisoned Fruit which
you are supposed to bring back to Proteri Amari.
Ikaav Ixvet Pox's poisoning
Proteri Amari says 'I knew Kunimi would come through! Our day of
escape is almost here. Take this to Abena Taifa. She is the servant who
brings Ixvet his meals and is loyal to our cause.'
You get a different
Poisoned Fruit
back (if you turn in the wrong one, you'll need to restart from
the beginning). This one goes to
Abena Taifa
in theory. Alas, she has run into a snag, and you'll have to find help
somewhere else.
Abena Taifa says 'Proteri sent word that you would be coming. I have
bad news. It seems Ixvet has gotten wind of a plot on his life and has
grown paranoid. He has started changing his personal servants on a
regular basis and I was replaced by Chiaka Lerato yesterday. I'm afraid
that I'm not going to be able to help you anymore.'
So, will Chiaka Lerato help?
You say, 'Hail, Chiaka Lerato'
Chiaka Lerato says 'I know of your plot and I have no
interest in being a part of it. It's too dangerous and more likely to
get us all killed than set us free. I don't want anyone else getting
hurt, so I won't tell the guards, but I will have no part in your
plans.'
You get the
Poisoned Fruit
back, again in a different form. You have a problem, how to get Chiaka to
cooperate, or have her replaced as body servant of Ixvet... Go back to Abysmal
Sea to find a member of Chiaka's family,
Hamisi Lerato, who is near the
Soulbinder:
You say, 'Hail, Hasimi Lerato'
Hamisi Lerato looks despondent. 'I recently managed to
escape from the city with my mother, but my sister is still stuck in
there. She was too frightened to escape with us and now I fear she may
be dead.'
You say, 'Chiaka is alive'
A look of astonishment flashes across Hamisi's face. 'You've
seen my sister? Is she ok? Where is she? Wait, there will be time to
talk later. For now, you must return to her immediately. Our mother has
been worrying herself to death and has grown very sick. I fear she
won't last much longer. Please, take this shawl to my sister. It's our
mother's. My sister will recognize it and know what it means. May the
ocean speed your journey!
You get a Tattered
Shawl to give to Chiaka.
Chiaka Lerato says 'How did you. . . Nevermind. I'd know this shawl anywhere
and it can only mean one thing. Mother needs me. I haven't heard from
my brother or mother since they escaped and I thought they might be
dead. I should have left with them when I had the chance. Fortunately,
Hamisi told me of his plans. I should be able to use the same route he
did to escape. Here, take this. I won't need it any more.'
You get Chiaka's
Serving Tray. Chiaka
then starts going out to Ferubi zone.
Now that Ixvet has ironically lost her most dependable servant, maybe the
next one will be more suitable to the plot.
Wait until Ixvet is up and go back to Abena Taifa. Hand her the
required Serving Plate and Poisoned Fruit that you got from
Chiaka.
Abena Taifa says 'Just in time! Ixvet is due for his next meal in a
few minutes. With Chiaka out of the way, I'll be able to serve him. I
hope this poison isn't noticeable. Here, I've managed to secret this
away from the guards up until now and I hate to think about those
beasts getting their hands on it. Please hold onto it for me. If this
goes well, I won't need it anymore.'
You get Chiaka's
Collar of Liberation as a (small) reward. Abena then walks to the Ikaav's room.
If you do nothing, she gets killed there, because one of the Aneuks Controllers will
taste the poison before the boss gets to eat it.
Kill Ixvet Pox and Talwin's remains, a fallen skeleton in one of the
buildings become targetable. That's a chest, similar to those in Lost
Dungeons of Norrath. Knock it down (attack) to get some copies of
Talwin's Final Report.
Shortcut
You do not need the poison, though. The poison will lock down the
Colossus of War in the Ikaav's room, making the fight
easier. You can though it out and take out all in Ixvet's room and loot the
remains afterward. You do need to go thru the dialogs however, to get the
appropriate intermediate flags.
The finale
Bring Talwin's Final Report to Taminoa.
Step #3: Riwwi
Talking to Taminoa Bialu
You say, 'Hail, Taminoa Bialu'
Taminoa Bialu says 'Greetings. You must be one of the
adventurers that Fezbin told me about. It is a pleasure to meet such a
brave individual. Where are my manners? My name is Taminoa Bialu and I
compile all the information from our scouts in the [city] area of
Taelosia.'
You say, 'What is Riwwi?'
Taminoa Bialu says 'Riwwi has to be the most interesting of all of the
city areas. You see, this is where the coliseum is located. Now, we are
not completely aware of how it was used before this invading army took
up residence in the area, but now it is used for the merciless
slaughter of the nihil. Early reports from our scout, Reyna, indicate
that the slaves in the area would not interact with her until she
proved herself. How she was able to do this I am not sure, but I would
suggest trying to find something of Reyna's while I go over my Riwwi
information. Come back to me when you find something.'
Note that Reyna is also involved somehow in the quest for the mask from
the Cragbeast Queen in Natimbi, but that's entirely
separate from here.
Reyna's demise
It seems Reyna did get in a bad situation. You will find
Reyna's Bloody Earring
as a random drop in Riwwi. Hand it to Taminoa:
Taminoa Bialu says 'This does not bode well for Reyna's fate. If I had
to guess, I would say they took her to the coliseum. Knowing what we
know about these strange beings, they would have taken her to the
coliseum just so they could entertain themselves by torturing her. You
must find a way into the coliseum and save Reyna. I think your best
plan of action would be to locate and speak to Turlini and Namosa. They
are two slaves Reyna mentioned in her reports. They may not talk to you
if you have not proven yourself, but once you do that they should be
pretty helpful. They may even know an easy way into the coliseum. Find
these two and ask them about Reyna. Return to me when you find out more
information about her.'
So, you are directed
to two slaves, Turlini and Namosa, who will not trust you at
first. This is an entire quest, which results in its own rewards, even if
you're not pursuing the overall quest.
Brace yourself, this is going to be pretty long.
Getting faction with the Yunjo Resistance
You can gain faction by relentlessly killing some of the mobs that give
off the required faction increase (not all do, and the faction is rumored to
be quite small).
You can also help some of the slaves. This is how Reyna did it. There are
some slaves that are hungry and thirsty, located in the first building to the
left of the Qinimi zone line. They require some player-made foods and drinks
from native Taelosian products.
- Thirsty Yunjo - Needs Taelosian Tea
- Starving Yunjo - Something with Cragbeast
- Emaciated Yunjo - Something with Crab
- Famished Yunjo - Something with Tuna
- Hungry Yunjo - Something with Hynid
Each slave will tell you what it wants (sometimes, they want something
other than what is specified).
Turn 8 of these for faction gain to the appropriate slave, and the slave
is sated and won't accept more (you need to wait for them to respawn as
hungry/thirsty ones). You can also turn 4, 3 then 4 to get 11 faction hits
instead of having the slave despawn after 8 turns-in (oddly, 3 then 4 can
result with the slave being sated at times). The respawn is 30mn, and
the type of Yunjo that pops is random, either Enslaved Yunjo, or one of the
5 ones.
The higher the quality of the food/drink given, the greater the faction
improvements. You need to be seen Warmly to talk to the two slaves. Note
that the Taelosian Morphemic Staff that you can /claim helps with that
faction!
If unsure of what to do, go check the fine folks at
EQ Traders for various recipes.
Namosa's family
This is moderately easy. You merely have to make the trip back and forth
between the various protagonists of the story, helping prevent suicide, and
giving hope to the Yunjo.
Pandula Bubundu's niece,
Namosa
Bubundu has been enslaved, and Pandula is anxious to know of her fate.
You say, 'Hail, Namosa Bubundu'
Namosa Bubundu coughs pitifully and looks through you with
weak eyes, 'This gazebo was once a place of contemplation, meditation,
and reflection, but now it is a place of torture. These slavers shackle
us here within feet of the pool of water and refuse us food or drink
for days at a time, accompanied by horrible beatings. And now, I have
had enough. I am through with this world and can only hope for peace in
my passing. Before I pass on I wonder if you could do a [favor] for
me?'
You say, 'what favor?'
Namosa Bubundu slips you a scuffed signet ring, 'Yes, yes.
Here is a family heirloom that I have been keeping secret from our
captors. If you deliver this ring to my kin, I can die in peace knowing
it never fell into their hands. There are rumors that some of my family
members have escaped the clutches of these monsters and made their way
into a city that floats on water. I hope you understand, friend. Go
quickly.'
Go now talk with Pandula Bubundu on the Absymal Sea ship
You say, 'Hail, Pandula Bubundu'
Pandula Bubundu says 'What can I do for you? I'm waiting to
hear word from the Wayfarer scouts. My niece has been captured by the
Muramites and I only wish to discover if she is still alive. I can't
take this, not knowing. I would much rather endure a thousand of those
beast's whips than be kept in the dark. Please find her for me.'
Give Pandula the
Scuffed Signet Ring
you got from Namosa.
Pandula
Bubundu sobs uncontrollably, tears welling up in her eyes, 'So my
little one is still out there. This is wonderful news. I can now die in
peace. The Wayfarers have transcribed my final wishes onto this
parchment. Please deliver this to Namosa.'
You receive Pandula's
Final Words.
Bring these to Namosa.
Namosa Bubundu gasps, 'What?! Oh no, this isn't good at all. She
isn't supposed to die. I am! Quick, go and see Councilman Tentric in
Qinimi and let him know what's happening. He has always helped our
family when we were in need. If you bring this token he will know I
sent you!'
You say, 'Hail, Councilman Tentric'
Councilman Tentric says 'You haven't come to demand
something of me, have you? I've been subjected to enough atrocities
already. Please leave this old man in peace.'
Turn in the
Token of Understanding
to the Councilman Tentric.
Councilman Tentric nods solemnly, 'Hmm . . . I see. So Pandula is contemplating
leaving this world. There is no doubt that these are hard times. Our
people are strong however, and nothing will truly break our spirit.
Please let Pandula know that the gods have not forgotten us. Bring her
this holy symbol.'
You receive a Symbol
of Faith. Bring it to Pandula.
Pandula
Bubundu looks quizzically at the symbol and rubs it in her hands. She
smiles as if realizing something, 'Ah, Tentric, you are always right. I
can't give up on this world or my family. I'm not sure why I was
behaving so selfishly. Take this flower to my niece, she will know what
it means.'
Finally, give Namosa the
Drakelily you
received.
You have received a character flag!
Namosa Bubundu says
'A drakelily? My aunt grew these in her garden. In fact, I helped her
plant some of them myself. She always told me they were a sign of hope.
Thank you, Xxxxx. I'll inform our people of your kindness.'
Namosa touches your shoulder and gazes at you with pleading
eyes. 'I hope this isn't presumptuous of me. You've already done so
much. Before you go, I need to ask you for another favor. Turlini is
under heavy guard in one of the nearby towers. The Muramites think he's
up to something and I'm concerned they may torture or kill him. Please
have a talk with Turlini when you can.'
You receive a Crescent
Stone Amulet, whose use is yet unknown.
Turlini's revolt
Turlini wants to be free. Who wouldn't.
You say, 'Hail, Turlini'
Turlini beams with excitement, 'I recognize you! One of the
adventurers we've heard tales about! There are rumors of you destroying
the Legion of Mata Muram. Have you come to set us free?'
You say, 'i have come to set you free'
Turlini says 'Bless you, we're saved! Listen up, friend.
I've already formulated a plan to stage a quick and decisive escape,
but first we need to get our hands on a complete set of shackle keys.
Just a few won't suffice; it must be entire set. If we were to rescue
only some of my brethren, those that remain behind would be brutally
tortured beyond imagination. Now, I've watched the guards carefully and
counted the silvery keys they carry. There are ten in total. Combine
the set in this sack and return it to me. I knew you would help!'
...
- Jagged
Silvery key:
A dessicated corpse is located right across the frist
bridge from Riwwi zone in from Qinimi. Approaching triggers 7 stonemites,
and the key spawns at the bottom of the canal once they're dead.
- Notched
Silvery key:
dropped by
Night Watchman Fxi in Riwwi
- Serrated
Silvery key: dropped by
Officiator
Keviazh in Riwwi
- Polished
Silvery key:
ground spawn at various places in Riwwi (appears at one place only at a time):
- 50, -490 underwater
- -328, -735 in the fountain
- -460,-280 in a ruined building between Qinimi and Ferubi
- 32, 32, on a crate
- 521, -682 behind a pillar
- -210, 0 outside of Qinimi entrance, near two fallen pillars
- behind the pillar in front of the officiator, to the right
- -240, -165 in small well on top of platform with the 2 named Nihil
- Ridged
Silvery key:
Talk to
Rorrst in
Abysmal Sea. For 25,000gp, he'll give you a
Impression of a Key.
Combine with a bar of silver in jeweler bag (you get the mold back on failure)
- Scored
Silvery key:
Talk to Inibi the Confused in Riwwi (jail cell in the lower Arena), and
ask "Please". If you have a high begging skill (151 or greater),
she'll give it to you.
- Five-Toothed
Silvery key:
uncommon drop from the Aneuks in Barindu's temple area
- Elongated
Silvery key:
ground spawn at -112,285 in a ruined building in Barindu
- Edgeless
Silvery key:
rare drop in Qinimi from kyvs and nocs
- Blunt
Silvery key: dropped by
Pixxt Krakt Ticov or
Pixxt Trext Rexi in Qinimi
Place these 10 keys in
Turlini's Key Bag, combine and give the
Sack of Silvery
Keys to Turlini.
You have received a character flag!
Turlini fishes a jagged key from the sack and tries it on his
manacles. They unlock with a loud snap and slide off his wrists. His
expression melts into simultaneous shock and elation. 'YES! We will be
freed. Very soon now, these chains will bind my people no longer! And
as for you, Xxxxx, you will become a legend among my people.'
Turlini can barely contain his excitement. 'This is wonderful news,
friend. Freedom is within our grasp! The only problem remaining is the
ever-present guards. They are always watching over us. We would need a
monumental distraction to buy enough time for me to release everyone.
Which is where you come in. One of your kind who goes by the name of
Reyna has been taken to the arena and has been tortured daily in front
of the Muramite masses. If you were to create enough of a ruckus in the
arena trying to free her I think we could make our escape.'
The Great diversion: Freeing Reyna
Once you have the flag from Turlini, you can start a series of
increasingly difficult fights in the Coliseum.
Talk to an enslaved yunjo in the Coliseum:
You say, 'Hail, an enslaved yunjo'
an enslaved yunjo says 'It's you! The champion everyone has spoken of! Have you come to defy the Muramites?'
You say, 'I have come to defy the Muramites'
an enslaved yunjo shouts 'Xxxxx defies you! Do you hear me? Xxxxx defies you and will destroy your kind!'
An officiator shouts, 'We'll see how defiant Xxxxx is after they have
been crushed for our amusement. Send in one of our trained hynids!'
an enslaved yunjo says 'Stand fast and prepare for a fight!
They're sending a bloodthirsty beast into the arena to kill you as we
speak. If you defeat it, place the head in this sack as proof and
return it to Turlini. He is the leader of the resistance and may be
able to assist you for helping us.'
You will
receive a bag, typicalled named Satchel of the xxxth battle (going
from first to tenth). This will also trigger one or several mobs coming
into the Coliseum. Kill the mob(s), loot its/their head(s), and place them
into the bag to combine into a Blood-Soaked Satchel
(10 different versions, one for each battle). Turn in the bag to
Turlini and you will get an
upgraded necklace, which you can then turn in to the slaves for the next
phase.
The main delay consists of going back and forth between the arena and
Turlini's cell. Multiple people can trigger
their own encounter one after the other, then the entire group take a trip
to Turlini, hand their satchels,
and then go back for the next set of encounters.
Turlini sometimes spawns a bit to the side (like in water next
to his haunt), so if he isn't right where you think it is, go check around.
Each encounter is a single group event. Anyone who aggros from the mob
outside of the group that did the turn-in causes the Officiators to call it
unfair, and they get ported to the zone line.
There are 10 successive encounters:
If you fail at one stage, you have to restart from wave 1 the series of
events.
The finale
After you've finished the diversion, Turlini has some good news
and bad news.
You have received a character flag!
Turlini shouts with joy. 'Aha, you've done it! Thanks to your
distractions in the coliseum, the Muramite legion is engulfed in utter
chaos. We will take this opportunity to escape. You have saved us all.
Oh, I almost forgot! Before I go, take this as a final gift from the
Yunjo. It holds much strength, just as you do. Unfortunately I have bad
news. Something I could not tell you until now. Reyna passed on a few
days ago. Her last request was that I give this to someone who had
proven his or her worth. You have more than done that. I wish there
were more I could do, but we are masters of shaping stone not life.
Turlini says 'I can't wait to be reunited with my family! Let's get out of this place.'
You get the final reward of the Arena diversion outlined above, and
Reyna's Scout Report.
Hand in the report to Taminoa.
Taminoa Bialu says 'Reyna was a skilled scout who had spent many
years honing her abilities. Learning that she died so horribly upsets
the stomach, but she died trying to help others. Yes . . . that's what
we should focus on. This report you have returned will be a great help
to us and this reward should help you as well. It was wrapped in the
report and appears to be a gem fragment that may fit into the stone
Fezbin gave you. Now to the rest of the city. Hopefully we can prevent
our other scouts from suffering the same fate as Reyna.'
You have successfully completed a section of the Taelosian City.
Step #4: Ferubi
Talking to Taminoa Bialu
You say, 'Hail, Taminoa Bialu'
Taminoa Bialu says 'Greetings. You must be one of the
adventurers that Fezbin told me about. It is a pleasure to meet such a
brave individual. Where are my manners? My name is Taminoa Bialu and I
compile all the information from our scouts in the [city] area of
Taelosia.'
You say, 'What is Ferubi?'
Taminoa Bialu says 'The area called Ferubi was once a Taelosian temple.
Now it is a place that reeks of pain and suffering. The invading army
has desecrated the temple and the slaves within endure unimaginable
torture. Based on the information our scout Smith Rondo sent to me
before his disappearance, the invaders use this area to craft weaponry
and conduct strange experiments. Smith's ability to sneak in and out of
places quickly made him the ideal choice for this job, but like most of
our other scouts he eventually got caught trying to reveal a vital
piece of information. We have confirmed that he is still alive and I
need you to go find him and give him this. It is a special farstone
attuned to his aura so only he can use it. Please make haste in your
mission, but be careful. You are entering the lion's den and if you are
caught, I cringe to think what will happen.'
You should get a Tuned
Farstone now. This is supposed to help get Rondo back home, much like the
Thurgadin Gate potion was used to get the hapless scout back to Thurgadin
during the shawl quest.
The Corruption of Smith Rondo
Give the Tuned Farstone to Smith Rondo
Smith Rondo says 'While I applaud your effort, I must decline. You see,
since I was captured I have been altered by the beings known as ikaav.
As a result, my aura has changed, making this farstone useless. I do
not know what it is I am becoming, but I will not place the lives of
the brotherhood in danger. I have decided to give in to the inevitable
and serve these beings. Please tell Taminoa I am sorry, but this is for
the best. And please give him this. As I slip deeper and deeper into
insanity, I have lost my ability to articulate my thoughts on paper.
This is one of my last written reports and I think Taminoa will find it
quite interesting.'
You get a Sealed
Report back. Go back to Taminoa in Abysmal to give the report
Taminoa Bialu says 'Ah. Glad to see you return and report that you
found Smith. Let me see, what does it say here . . . oh my, I can't
believe this. These beings are truly insane. This is a detailed account
of the experiments the Muramites have been conducting on the natives
and on Smith. If what is listed here is true, we must find out more
about this. It says that this is one of two reports he wrote, so we
must assume he still has the other one on him. It also says here that
the weapon master has access to the mountain area that leads to a
secret way into the temples where they conduct these experiments. Oh,
poor Smith. As soon as he figured out what was going on he documented
it, hoping that he could somehow get it back to us without them finding
out. Hm . . . here at the bottom he gives details about the weapon
master. Seems he only enters the Ferubi area to fix the weapons that
his four elite guards use. Knowing this, I am sure we can trick him
into appearing. You must return to Ferubi and find his elite guards and
collect a different weapon from each of them, but remember the weapon
has to be damaged. Sounds like this is pretty durable stuff they use,
so it may take some time to accomplish this. Either way, once it is
done I would suggest giving the pieces to Smith and asking him to
help.'
Freeing Smith Rondo
You have to get four NODROP weapon parts.
Prepare a raid now, and turn the 4 weapons to Smith Rondo. This will attract
the attention of the Weaponmaster itself.
Kill Weapon
Master Vtiink Vzaan and his
apprentices.
As you kill its master, Smith Rondo finally succumbs to the transformation pushed
on him, and turns aggro. You now have to kill him.
After defeating him, his ghost spawns. Hail the ghost to receive a flag
to bypass the first 4 trials in the sewers for the zone progression (it has
been reported that merely killing the Weaponmaster alone is enough to allow
you the bypass, even though you didn't get a flag).
If you have also completed the quest steps so far, you will also receive
Rondo's Report.
Any number of reports can be received at a single raid, as long as you are
flagged has having handed the previous report from Rondo in Abysmal sea.
The raid can be triggered whether or not anybody is doing the quest at the
moment. You do need to be in the raid that triggered the Weaponmaster
to get the appropriate flag/report, otherwise Rondo's spirit will ignore
you.
You say, 'Hail, Smith`s Spectral Memory'
You feel a chill surround your body as a voice enters your
mind. 'Thank you for releasing me from an eternity of suffering. Now
you must help the others on this continent whose fate I fear is much
worse than mine. You must seek out Apprentice Udranda in Barindu. She
can help you gain access to the temples beyond the mountain passes.'
The finale
Turn in Rondo's Report to Taminoa. You have now finished the
city scouting.
Step #5: Sewers
Talking to Vaifan Cogswin
Vaifan
Cogswin is also located in the same area as the previous quest givers.
You say, 'Hail, Vaifan Cogswin'
Vaifan Cogswin says 'Well, hello traveler. You here to help with the scout problem we've been having?'
You say, 'yes i am here to help'
Vaifan Cogswin says 'Good to hear. I have been going out of
my skull trying to tinker another one to find the first. Now that you
are here, I can stop that and focus on compiling the information I
already have. Let me tell you, being in charge of something like this
is very taxing on the nerves. I remember being a young gnome and
whenever I tinkered something it worked the first time. Ah, how good it
felt to put the Cogswin family emblem on my wonderful creations.
Nowadays it seems like everything I make has some intermittent flaw or
defect. I might have to accept that I am getting old and a little slow,
but I still have the wits to invent. I should stop rambling and get to
the point. I am in charge of scouting the mountain areas known as
[Tipt], [Vxed], and the [sewers] under the city. Which would you like
to know about?'
You say, 'the sewers'
Vaifan Cogswin says 'According to my records here, the
sewers are a pretty vile area. Filled with some strange creatures, I
hear. So, being the genius that I am, I came up with a plan to use a
prototype clockwork scout I built when we were having problems
exploring the catacombs in Mistmoore. He appeared to be working fine. I
received constant detailed reports on the sewers and mountain areas
until one day it stopped. For some time I tried to make contact with
the clockwork, but nothing. I started working on a second one to
retrieve the first when Falcin stumbled onto the boat. In his struggle
to get back to us he had to make his escape through the sewers. While
going through there, he found this. This is the reporting module used
by the clockwork scout. It does not look like much now, but you should
have seen it when Falcin gave it to me. I have repaired most of the
damage in an attempt to access the information stored within, but there
are four vital components missing. I need you to go to the four sewer
areas and find a timing gear, a rusty spring, an oiled belt, and a
processing gizmo. When you have them all, place them inside the gearbox
and combine them. Once this has been done, the gearbox should give you
a report. Return the report to me.'
A gnomish contraption
Time for a little collect again. Never trust a gnome. You knew there was
some newfangled thingy to be had, did you?
| What? | Where | Who?
|
|
Timing Gear
| Crematory
| Cryxtetl
Diseased Larva
Slime Devourer
|
Oiled Cog
(gnome's been slipping again, confusing a belt and a cog)
| Lair
| Blistering Larvae
Sludge Eating Fly
|
|
Rusty Spring
| Pool
| Disdraught Slimesnipper
Festering Sewer Gnat
Xthid the Undying
|
|
Processing Gizmo
| Plant
| Grimy Turepta
Ukun Packleader
|
All the named mobs in the various sewers areas sometimes drop the requisite
part (and only them). You need to kill 20+ mobs in each zone before the nameds
or their PH start to spawn.
Upon combine into the
Broken Clockwork Output
Gearbox you received, you get a
Repaired Clockwork
Output Gearbox back, as well as the
Mangled Report you
were looking for. Turn the report in to Vaifan for the reward.
As you fit each piece into place the small device comes to life.
Whirring and clicking, it begins to shake in your hand as a mangled
piece of paper slides out of an opening on the front. Then, just as
quickly as it started the device goes dead.
Vaifan Cogswin says 'Grrr, I was afraid of this. Seems without
the extra modules working together this one won't function completely.
Nonetheless at least it is fixed now and with your assistance we should
be able to reassemble the scout and place this module back inside. Take
this. I found it in the gearbox when I first received it. Seems like it
may have some affinity with the stone Fezbin gave to you. Let me know
when you are ready to help out some more.'
Flag: You were successful in helping Vaifan complete her report of the sewer areas
Step #6: Vxed
Talking to Vaifan Cogswin
You say, 'Hail, Vaifan Cogswin'
Vaifan Cogswin says 'Well, hello traveler. You here to help with the scout problem we've been having?'
You say, 'vxed'
Vaifan Cogswin says 'We have discovered that this continent
holds many dangerous creatures, including the strange beings of the
invading army. Many of these beasts can be found in the mountain area
called Vxed. After being severely damaged in Tipt, the clockwork scout
made its way back to Vxed to perform self maintenance, but I believe
this is where it met its final demise. While the chance is slim, I
believe you may be able to salvage enough of the parts from the
creatures within Vxed to reassemble the frame. What you will need to
find is a flickering finkenheimer, a tarnished sprocket, some uncoiled
springs, a greased bolt, and some connection rods. When you have them
all place, the sprocket, springs, bolt, and rods in the finkenheimer
and bring me the result. I must warn you to be careful though. If these
things could stop my clockwork, they must be pretty powerful
creatures.'
The collection
You need
Place the 4 items in the finkenheimer, and combine. You do need to have the
quest assigned to you by Vaifan Cogswin, or your combine will give you no
result (and the items still be destroyed).
The finale
Turn in your completed finkenheimer to
Vaifan:
Vaifan Cogswin says, "I can't believe you did it. Not a bad job is I
do say so myself. You may have a future in tinkering my young friend.
Now, if you will give me one second to change a few things and rip this
part out, adjust this here, add a couple of these, and there you go, a
nice new clockwork frame. Now we just need to collect the rest of the
pieces to rebuild him. Oh, and before I forget, here is reward for
helping me out. Let me know if you wish to explore any of the other
areas by asking me about them."
Flag: You were successful in helping Vaifan complete her report of the Vxed mountain area.
Step #7: Tipt
Talking to Vaifan Cogswin
You say, 'Hail, Vaifan Cogswin'
Vaifan Cogswin says 'Well, hello traveler. You here to help with the scout problem we've been having?'
You say, 'tipt'
Vaifan Cogswin says 'The mountainous areas of this continent
hold many dangers within them. Tipt in particular is thick with members
of the invading army, dangerous creatures, and the angry spirits of
nihil refugees. Looking at the information I have, the clockwork scout
tried to take a direct path to the other side of Tipt and had some
serious problems. Apparently, it had a run in with some cragbeasts, a
pack of ghosts, numerous Muramites, and a native riddlemaster. While he
made it pretty far, he took significant damage each step of the way. My
last report received for this area stated that it was returning to the
Vxed area to recover, but had lost multiple power cells in the process.
I need you to retrieve these power cells. They are vital to rebuilding
the scout and getting that report. There are five different types of
cells, each one is called Vaifan's Power Cell -- named after the most
ingenious gnome there is, of course. The cells are named from A to E.
When you have collected all of them, place them in this power pack,
activate it, and return it to me.'
Little cocky gnome, is she?
At this point you received a
Depleted Clockwork Power Pack to assemble the power cells.
Getting the cells
The cells are rare drops from the mob mentioned by Vaifan.
Combine the 5 power cells, and you will have a
Fully Charged Power Pack.
Give it to Vaifan.
Each battery slides neatly into place as the power pack emits a low whine indicating it is powered up and fully operational.
Vaifan Cogswin says 'Wonderful. While the power cells were
slightly damaged I was still able to increase the strength of the power
pack for a short amount of time. This should give the scout just enough
power to produce a legible copy the report. Thank you for the
assistance, take this i scraped it off the side of the power cells.
Looks like it might be able to add some power to the stone you
recieived from Fezbin. There are still some areas left to explore, so
when you are ready ake me about the next area you want to look into.'
Flag: You were successful in helping Vaifan complete her report of the Tipt Mountain pass.
Step #7b: The full clockwork
The dialogs in part #5, 6 and 7 are those you get when completing each
step without completing the others. When you complete the last step, the
dialog changes.
Vaifan Cogswin says 'Now that we have all the functioning pieces, we
can reassemble the scout. Take these instructions and this power pack
adapter and return to either mountain area to assemble the scout. I
would have you do it here, but I fear he may be unstable and . . .
well, let's just say I don�t want to put the ship in danger. Please
return to me with the report once you have it. I am going to prepare my
final report so when you return I can take it straight to Fezbin. Good
luck to you.'
You must reassemble the Extended Life Power Pack, the
Power Pack Adapter and the Repaired
Clockwork Output Gearbox into the
Inactive Clockwork Scout Module container. This combine
works only in Vxed or Tipt, as indicated on the book.
With the final piece in place, the clockwork scout's eyes light up as it comes to life.
(You now have a non-aggro clockwork.)
You say, 'Access code 040703'
Clockwork Scout Model XIII says 'Verifying password and user identity . . .'
Clockwork Scout Model XIII says 'Identity verified as Xxxxx. Processing scout report. Please return report to Vaifan.'
You get an
Outer Regions Scouting Report
as the final report. Only the person who spawned him can get the access.
After 1mn, the clockwork scout despawns:
Clockwork Scout Model XIII says 'Power cells low. Shutting down to reserve power.'
Turn in the report to Vaifan back in Abysmal sea.
Vaifan Cogswin says 'Excellent. It is always wonderful when
something you invent works out. This was all I needed to finish up my
report to Fezbin. Thank you once again. You have been very helpful.
Once again I must reward you with this. When you brought the clockwork
frame to me this fell out of it. I think it will go with your mask
quite well. Try combining the two together and see what happens. I must
say goodbye now.'
Flag: You were successful in helping Vaifan complete her report
of the sewers and mountain areas. Fezbin will be pleased, but there are
others who need your help.
Reward: whatever shard you were supposed to get as the last step of Vaifan
(you did get the shard during each individual step only if that's not the
last quest step for Vaifan)
Step #8: Yxtta
Talking to L`diava Rexxen
Find L`diava
Rexxen in the same area as the others.
You say, 'Hail, L`diava Rexxen'
L`diava Rexxen says 'Yes, yes. What is it I can do for you?
I am a very busy woman and do not have a moment to waste on just
anyone. Are you one of the adventurers sent here by Fezbin?'
You say, 'yes i am'
L`diava Rexxen says 'Very good. You are just in time. I am
in need of immediate assistance in the temple areas known as [Yxtta]
and the [frightful temple], Kod'Taz. While our scouts have been missing
for quite some time, I recently received some information that leads me
to believe they may still be alive. Which one we help first is up to
you. Which area do you wish to investigate?'
You say, 'what is yxtta'
L`diava Rexxen says 'Yxtta is one of three smaller temple
areas where a group of natives known as the trusik used to worship a
god called Trushar. We do not know who this god is, but we believe he
is a false god centered around a belief in natural destruction. Xounii
Resnen was the scout assigned to this area. She was given this task
because of her expertise in shapeshifting. I told her to take the shape
of a trusik native and interact with them to find out more information.
She managed to fit in quite well. Perhaps too well. Gradually, reports
came less frequently until they eventually stopped. While everyone
feared she had suffered the same fate as the other scouts, I think she
started to believe she was really a trusik and has abandoned her
assignment. What I need you to do is go there and find her. Now, be
careful, the trusik are not a friendly race of beings and they are even
more irritated by the invasion of the Muramite army. When you find
Xounii I fear she may attack you. If this happens, I will not fault you
for defending yourself, but if it comes to this I want some form of
proof as to what happened.'
Xounii's Journal
Xounii's Journal
Page 1 drops the shapeshifting wanderer. It seems that
Xounii got so deeply shapeshifted she forgot she wasn't a
beast in the first place. You will identify her because she changes shape
according to whatever area she goes to (become an insect near the insect part,
become a cragbeast near them, and so on).
Upon bringing back that page, you are told to find the rest of the journal,
which drops from the various bosses of the zone.
L`diava
Rexxen says 'Thank you for returning this to me. I wish the
circumstances could have been different, but in honor of her memory, we
will use this information to prevent the needless death of any other
scouts. Now let me see what is written here. Hm. Seems she stumbled
onto a secret ritual of some sort in an underground temple, called
Uqua. Looks like the Muramites may be trying to reproduce another tear
in space. This does not bode well for anyone. We must find out more
about this. I must ask that you return to Yxtta and see if you can find
any more of Xounii's entries. I cannot tell you where to start looking,
but it seems that the best place to look would be in the caves where
you found her. Xounii was very diligent about her reports so she would
have written much about this. Try to find four more pieces of her
journal entries and return them to me.'
These are:
Bring the 4 parts to complete the report from Yxtta and get your shard.
Step #9: Kod'Taz
Talking to L`diava Rexxen
You say, 'Hail, L`diava Rexxen'
L`diava Rexxen says 'Yes, yes. What is it I can do for you?
I am a very busy woman and do not have a moment to waste on just
anyone. Are you one of the adventurers sent here by Fezbin?'
You say, 'what is the frightful temple'
L`diava Rexxen says 'Kod'Taz is made up of multiple temples
that were once used for worship by the trusik natives. Many of them
have since been destroyed or made into strongholds for the Muramite
army. Due to the sheer size of this area, we sent a scouting force
there to investigate. All of them are still alive, save one, named
Kitren Lanom. None of the scouts left in the area know what happened to
her or her belongings. Last time they remember seeing her was when she
entered the Temple of Tri-Fates in an attempt to pass the temple trial.
Please go to Kod'Taz and speak to Kevren Nalavat. He should be able to
help you access the three trials. You will have to enter each trial and
bring me back anything you find of Kitren's from each temple. Even
though the scouts there have searched many times for something, I think
a fresh set of eyes may help some. Kevren is the only one who knows you
are helping me. Please do not let the others know you were sent by me.
I have not yet ruled out the possibility of foul play and if they are
aware of your affiliation, it may place you in more danger.'
Kitren's Tattered
Cloak can be found in the a pile of bones which is the reward
"chest" from the 3rd Ikkinz single-group trial. Turn it to L'diava:
L`diava
Rexxen says 'Oh, thank you brave adventurer. We are now one step closer
to finding out what happened to Kitren. Now, give me one second to look
through the cloak here and . . . here it is, Kitren's notebook. There
must be some information here that can help us more. While I read
through this, I need you to return to Kevren Nalavat. He believes he
may have found more clues to Kitren's whereabouts and since you did
such a good job with the trials he believes you may be able to help
him. Even though you have proven yourself by defeating the trials, he
will not give you what I need unless you help him. When you return to
him, show him this letter and it will confirm my trust in you. Hurry
now. There no time to waste!'
Find Kevren Navalat, and hand him the note from L'diava.
If you handed the cloak before you finished all of the first 3 single-group
Ikkinz trials (and turned the key items to Kevren Navalat), you will be
bugged, and Kevren will not accept the letter. In that case, you will need
to reset the entire Kod'taz step, acquire a new cloak, and redo the
turn-ins.
Kevren Nalavat says 'Seems you have made quite an impression if you are
trusted by L`diava. But don't think that this means you do not have to
gain my trust. While you survived the three trials I am still in need
of assistance, I some [other tasks] completed, when you have finished
them please return to me and tell me you have done all I asked and I
will give you what you came here for. If you do not wish to start these
tasks right now we do have some time to talk a little [more].'
Asking about the "other tasks" leads you to the standard Kod'taz flag
progression. You do need to complete that progression to get the
Kod'taz reward:
- You have completed the trial at the Temple of Singular Might!
- You have completed the trial at the Temple of Twin Struggles!
- You have completed the trial at the Temple of the Tri-Fates!
- You've returned four relics from the Martyrs Passage!
- You've recovered important glyphs from the Temple of the Damned!
- You were able to recover a rare artifact from the Grand Summoner's goons in the Summoning Circle!
- You've recovered the Sliver of the High Temple! Congratulations!
Trial #1 - Singular Might
Say "Singular Might" to Kevren and then head to the middle temple to the south. Gazak Kleikek is the NPC required to start the expedition, he is a monk feigned death just west of the temple entrance.
The trial is very straight forward trial up until you get to the Diabolic Destroyer. She is in the first room on the right along the main hall. You need a strong tank, cleric and bard/enchanter for this.
NOTE: The Diabolic Destroyer will mem blur if the warrior uses defensive. Upon engaging the destroyer, three adds will spawn. Throughout the fight, more adds will spawn in groups of 1-2. These need to be trained or mezzed.
Once the Diabolic Destroyer dies, Cruel Illusion will spawn (a rather trivial encounter in comparison). Kill the illusion and loot the Ruined Pendant of Might. Hand that back to Gazak to obtain the first line of progress text.
Finished!- You have completed the trial at the Temple of Singular Might!
Trial #2 - Twin Struggles
Say "Twin Struggles" to Kevren then head to the far south temple and find Maroley Nazuey who is hidden behind some rocks just to the west of the temple complex. This will start the expedition.
This trial requires two strong tanks, a cleric, a slower (enchanter preferred), a second healer (druid preferred), and DPS.
The final named are in a pair in the first room on the left following the main hall. The named themselves start out unkillable, but they will cast their fairly nasty AoE's on you once they see you. Around the named are nine servants who are rooted and won't attack you, these mobs add power to the main named and must be killed to spawn them. Each servant has a different "job", be sure to kill off the ones with damage shields first, leave a blue-con mob till last so you can kill it easy to activate the nameds. Once the named are active, burn down one as fast as possible, then finish the 2nd off. They have huge DPS, so be ready.
Once both named are dead a box will spawn in the south cubby, /open the box to loot the Stained Stone Chalice and hand that to Maroley to obtain the next line of progress text.
Finished!- You have completed the trial at the Temple of Twin Struggles!
Trial #3 - Tri-fates
Say "Tri-fates" then head to the Northern most temple, Kenra Kalekkio is the npc you're looking for, she's to the East of the main temple complex. Talk to her to start the expedition.
Group make up for this is fairly standar: Cleric, warrior, slower, second healer useful, then DPS.
The final named are located by following the main Ikkinz hall way all the way down the first ramp, and into the door with three alcoves. There is one named located in each alcove within that room. Once a named is agro'd it will spawn about five non-targettable archers, each, who will ping away at anything they can. You must kill the three named one at a time, working from North to South. The thing to remember is that the named will pick up on the agro list of the previous named, so on the second and third named your healers will start with a lot of agro right off the bat.
It's suggested that you save all disciplines on the first named, since failing him has no consequences, where as if you fail the second or third named and there is nobody left in their room, any previously killed named will instantly respawn. Once he's dead I suggest you camp out your cleric so that she looses agro on the archers. Also suggested is your tank taunt/etc to get main agro BEFORE doing any damage, otherwise the named will start summoning immediately. Have the MT blow riposte disc on #2, and melee burn their DPS discs. Then you can rest up as needed for #3 who I feel is a lot easier.
Once the 3rd named is dead several boxes will spawn on the East wall, /open them to find the Thrice-Notched Arrow Remains. Hand it in to Kenra to obtain the next progress text.
Finished!- You have completed the trial at the Temple of the Tri-Fates!
Kevren Nalavat's Tasks
The following tasks must be completed in order. You'll need to talk to Kevren and get a portion of text in your Progress Updates (the "finished!" messages) before you attempt the turn-ins that he wants or he is likely to eat your parts.
Task #1: Martyr's Passage
You will need to collect four Relic of the Martyr. They are all lore and have the same name, however, have different lore messages. All four can be found as groundspawns, and all four can also be found as drops from ghost mobs in the martyr's passage and in the temple right at the end of it. It is easiest (for most classes) to bring a wizard friend, and have him give you a TL box. Run in, grab the groundspawn, then click yes for the TL. Repeat three more times and you are set. The locations of the groundspawns are as follows.
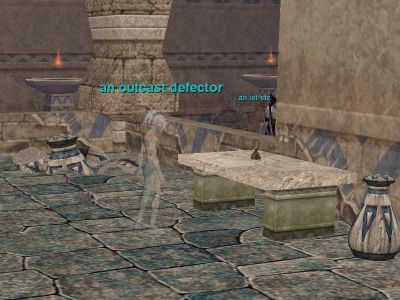
On the table in the left hand room inside of the temple. Loc = -1031, 1230, -423.
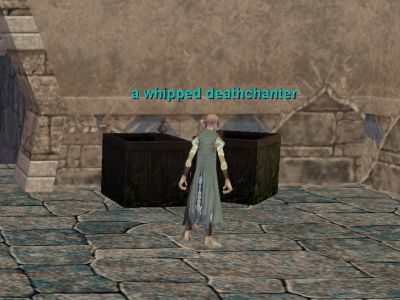
As you enter the temple the Relic is just to your right on box . Loc = -1088, 1168, -419.
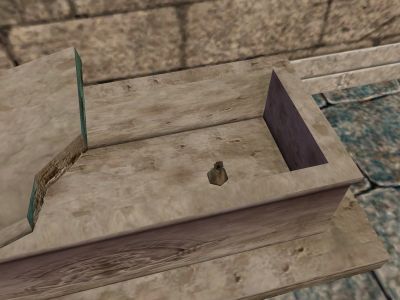
Relic inside of the coffin in the far right little hut. Loc = -1686, 1269, -380.
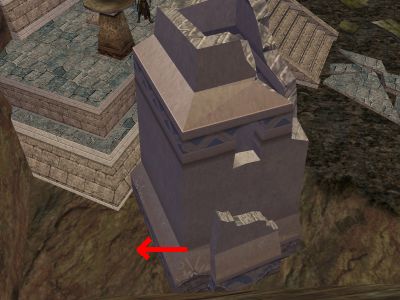
Facing the temple at base of the steps, to your left, behind the little hut with a goat in it. Loc = -1316, 1285, -428.
Have a chat with Kevren
You say, 'Martyrs Passage'
Finished! - You've been commissioned to investigate the Martyrs Passage!
Hand him the 4 relics, all at once.
Finished! - You've returned four relics from the Martyrs Passage!
Next, you will need to kill mobs in the passage until a Parchment of Flesh drops. Loot it and give it to Kevren.
Finished! - You've returned valuable information as to why the Muramites are in the Martyrs Passage!
Task #2: Temple of the Damned
You say, 'Temple of the Damned'
Kevren will go through his chat, follow whatever he wants you to [say] to get through it (email me a log of the chat if you have it please.)
The temple Kevren speaks to you about is the one directly south of Kevren (closest temple to the zone in.) Clear into the basement and /open the pile of bones. There is no need to clear the mobs in the small rooms to the left and right before the basement. When you /open, several goats and aneruks will spawn. Its easiest to pull them all out and have an enchanter mez them. Kill one at a time. Each one of the four main mobs will drop 6 Glyph of the Damned and the boss mob will drop an item (175ish hps.) Loot the four different Glyphs. Hand all of them to Kevren so you can get a character flag, he will give them back.
Finished! - You've recovered important glyphs from the Temple of the Damned!
Now head over to Tublik (he hangs out at the 3 way intersection by Yxtta and the Martyr's Passage. Talk to him about the temple of the damned and get the bag from him. It is an eight slot container. Next run around Martyr's passage with invis and pick up four of the Pile of Dust. Stick all four Glyphs of the Damned and all four Pile of Dust in the container Tublik gave you and combine. Give the result to back to Kevren.
Finished! - You've successfully translated the glyphs you found in the Temple of the Damned!
Task #3: Summoner's Ring
You say, "think you can do"
Finished! - You've been charged with stopping the ceremony at the Summoning Circle!
The Summoner Ring event is found just before entering the main Kod'Taz courtyard area where the Ikkinz raid entrences are found. Once the Grand Summoner is dead you need to loot a Grand Summoner's Glyph and hand it in to Kevren to recieve the next line of progress text.
Finished! - You were able to recover a rare artifact from the Grand Summoner's goons in the Summoning Circle!
After doing all of that...
You say, 'I have done all you asked'
Kevren Nalavat says 'Indeed you have and your help is greatly
appreciated. Take this back to L`diava I believe it has the answers she
seeks.'
Take the Sealed Confession and give it to L'Diava.
L`diava Rexxen says 'Once again, a job well done. I hear you
accomplished the tasks with flying colors. Now let's see what this
says. Hm . . . this changes everything. I never suspected something
like this, but now that I know, it all makes sense to me. Oh poor
Kitren, why didn't you warn me first? Please leave me be. I must take
sometime to think. Take this as proof of your accomplishments in
Kod'Taz. It possesses a power that you can unlock when you combine it
with the stone from Fezbin. Return to me later if you wish to
investigate Yxtta.'
Flag: You were successful in helping L`diava complete her report of
Kod'Taz. Fezbin will be pleased, but there are others who need your
help.
Step #10: Free stuff!!!
Time to head back to Fezbin after completing all the steps.
You say, 'I have completed your task'
Fezbin Fizzles says 'So I have been told, Xxxxx. Your help will long be
remembered by the brotherhood. Since you first came to me, the stone should
have grown in power and now I will give you the item that will unlock the
stone's full potential. Please combine this with your stone after you have
combined all of the other items given to you by the lead scouts and you
will possess an item of immense power and a symbol of your fighting spirit.
Once again, the brotherhood thanks you. I must bid you good day as I
recently received some [interesting information].'
Flag: You have done quite well and your exploits will forever be talked about
by the members of the Wayfarers Brotherhood, but don't you dare relax as
there's still many more adventures and hidden treasures out there waiting
for a hero like you.
You say, 'interesting information'
Fezbin Fizzles says 'Where are my manners? I should have known someone as
adventurous as you would be interested in this. One of our researching experts
by the name of Beanalle has recently discovered some very intriguing
information about the temples beyond Yxtta and Kod'Taz.
Step #11: Qvic
Time to head to the fourth specialist, Beanalle Banoam:
You say, 'Hail, Beanalle Banoam'
Beanalle Banoam says 'Hello, Xxxxx. It is truly an honor to meet you. I
have heard some great things about you and hope that what I have
[discovered] will interest you.'
You say, 'discovered'
Beanalle Banoam says 'After going through some of the
reports submitted by the scout leaders, I was able to figure something
out about the temples that lie beyond Yxtta and Kod'Taz. Apparently,
the temple called Qvic is where the Muramite army first broke through.
The temple was ravaged by the force of the explosion when the portal to
the Muramites' realm closed. Of course, as you know, they are not the
only thing that came through the portal. The strange magic stones we
discovered were also a result of that explosion and up until now we
thought we had found the most powerful ones. After going through the
reports, I found out that concentrated pieces of the magic-imbued
[matter] lie in the Qvic temple area and beyond.'
You say, 'matter'
Beanalle Banoam says 'These pieces of matter possess vast
power like none we have ever seen, but there is a drawback. You see
these special augmentations? I have come to call them shards of power
because of the odd shapes they take. They must have their power removed
and condensed before they can be applied to an item. I have figured out
a way to do this, but another [drawback] has prevented me from testing
my theory further.'
You say, 'drawback'
Beanalle Banoam says 'Well, these special shards can only be
combined with an item they are attuned to. In other words, the
materials that make up an item determine if these shards are compatible
with it. Now, I have found many formulas that will allow for a
particular shard to merge with a particular item. Recently I discovered
one [item] that was perfectly in tune with them all.'
You say, 'item'
Beanalle Banoam says 'Why, your stone of course. The
different items you have added to it have altered its makeup so much
that it is hardly what it was when you first received it. It is a
powerful item that can be made even more powerful with my help and
yours, but this will require the help of many and I am afraid we do not
have the force to take on such a task. Do you think you would be
willing to collect the four shards of power from the temples and bring
them to me as you get them?
You say, 'yes'
Beanalle Banoam says 'Excellent! I knew Fezbin was right
about you. Okay, here is what I can tell you. Qvic, Inktu'ta, Txevu,
and Tacvi are the names of the temples beyond Yxtta and Kod'Taz. Within
each of these you should find a shard of power. The hard part will be
finding one as the Muramites are aware of the power within them and are
hoarding every piece they find. If my theory is correct, you will have
to combine the shards in a particular order before the stone will
become attuned with another. You should retrieve the shards from the
temples in the order I said before -- Qvic, Inktu'ta, Txevu, and Tacvi.
Give each shard to me one at a time so that I can remove and condense
the magic for you and then you can combine them in the special sealer.
Now, hurry! I am worried that the leader of the Muramites may realize
he needs to get rid of these shards, before we can get our hands on
them.
So here you are. The next 4 steps are all about recovering the last 4
shards in each of the 4 end zones in order.
This Shard of Dark
Matter is the first one. It is an drop of Cynosure Kvanji
(might drop up to 3).
Step #12: Inktu'ta
That Shard of of Dark Matter
(looks like the same from Qvic, but that's a different one) from Inktu'ta is
an uncommon drop from Noqufiel, the final boss of the zone.
Combined with the Black Matter Gemstone, yields one of
Step #13: Txevu
That Shard of of Dark Matter
(looks like the same from Qvic and Inktu'ta, but that's a different one)
from Txevu is a drop from
Zun`Muram Tkarish Zyk, the final boss of the zone.
Step #14: Tacvi
Due to a bug, it seems the combine order for Txevu and Tacvi has been
permuted. In other words, you need to combine the Tacvi piece first, then the
Txevu one.
Document history:
| Aug 1, 2004 | Added some links to mobs
|
| Jul 17, 2004 | Respawn time for Barindu removed (reported wrong)
Warning about Txevu/Tacvi piece
Adjusted Kevrin's tasks
|
| Jul 13, 2004 | Switched over to css-based presentation for readability
Poison not absolutely needed for Barindu event
Respawn on Ixvet/Talwin remains added
Warning for Kodtaz tasks order added
Final rewards spotted on Lucy?
How to identify Xounii
|
| Jun 21, 2004 | Step 12 reward for priests listed
Possible step 13 shard found
|
| Jun 18, 2004 | Step 9/10&11 reward for priests listed
Xounii page drop adjusted
|
| Jun 13, 2004 | Step 12 reward for pure melee listed
|
| Jun 9, 2004 | Step 11 reward for casters listed
Step 11 drop listed
Step 12 drop listed, step 12 reward for hybrids listed
Drop for Cell E fixed
Kod'taz details added
|
| May 29, 2004 | Sewers drop retune mentioned
Reyna's mention in relation to the Cragbeast queen
Some details on Turlini's despawn/respawn
|
| May 16, 2004 | Step 11 in progress
|
| May 7, 2004 | Couple more augments
Fixed presentation errors
Xounii's report pages drop info
Added a couple of NPC/mob links
|
| May 3, 2004 | 10th melee augment
Warning about 10th augment replacement
Additional key spawn location
|
| April 27, 2004 | Details about named spawns in Sewers
|
| April 26, 2004 | More linked gemstones
|
| April 23, 2004 | Added some links
|
| April 19, 2004 | Step 7, 9 & 10 reward for hybrid melee
Swapped step 8 & 9
Step 10 & 11 added
Stone of Entry raid details added
|
| April 17, 2004 | Details on Kitren's cloak
|
| April 16, 2004 | Kodtaz shard listed
|
| April 14, 2004 | Named details for sewer drops
Kitren's Tattered Cloak spotted
|
| March 27, 2004 | Details on fixed Scout rescue in Qinimi
Confirmed that Fezbin will give you the augment back if lost/used
|
| March 25, 2004 | First 4 steps are in correct order, gem #4 is found
Fixed Kunimi's dialog
Added final steps for Qinimi
|
| March 24, 2004 | Qinimi yields a dull gem shard
Riwwi is apparently not step #2
|
| March 22, 2004 | Final steps of Barindu quest part
Mention of the executioner after the boss in Qinimi event
|
| March 20, 2004 | Minor precisions on ground spawn and drops
|
| March 17, 2004 | Added Talwin's final report and shiny gem shard
|
| March 16, 2004 | Polished Silvery Key 7th spawn location
End of sewers dialog
Fixed Coliseum encounter list
Other intermediate dialogs
Additional Vaifan quest step
Additional Barindu steps
|
| March 15, 2004 | Polished Silvery Key ground spawn locations
|
| March 14, 2004 | Added Yxtta's last page
Finished Tipt's collection
Precisions on Ferubi's raid flagging
|
May 5, 2005 | Mirrored website and updated several typos and broken links |
| May 5, 2005 | Added Checklist |
August 24, 2005 | Complete overhaul of the Kodtaz and freebe section. Added all the information regarding the Kodtaz tasks but NPC transcript still missing. |